One big cause of this is mass production - the DVB-T (Digital Video Broadcasting) technology caused mass production of receivers that you can use to receive digital TV on your laptop or desktop PC. With mass production comes low cost.
Well, it didn't take long for some experimenters to realize that with some software changes on the host computer, these mass produced devices could be re-purposed to become general purpose receivers that work between 25 MHz and 1.8 GHz.
Further mass production led to these "$20" devices being available for less than $10 on ebay.
The Advent of the Raspberry Pi single board computer has also democratized the personal computer market. A computer that would have cost thousands of dollars a few decades ago is now available for $35. Oh, and that $35 gets you much more power!
Putting the $35 computer and the $10 SDR Dongle together can get you very useful and good performance for the price.
The following was shown at Maker Faire in San Mateo by the Amateur Radio club I associate with (Bay-Net).
Firstly, keeping thing really simple - an SDR receiver and general purpose software (GQRX)

GQRX will display a chunk of spectrum on the screen, amplitude vs frequency, so you can see where the signals are there, click on them and hear what information they are carrying. To be honest, a lot of people use a program like this to listen to a few stations and put the SDR Dongle back in the draw. One reason is that the computing needed to use this software was that of a laptop or desktop PC.
With the launch of the third generation, the Raspberry Pi 3 is finally capable of running GQRX, so the $10 SDR Dongle and a $35 Raspberry Pi are capable of making a spectrum analyzer that works between 25 MHz and 1.8 GHz. Not bad!
Next step is to add a signal source - this enables you to perform measurements that would have cost thousands of dollars not that long ago. Want to check that FM band reject filter you just made? Use your $10 SDR Dongle and a $20 Noise Source as a signal generator.
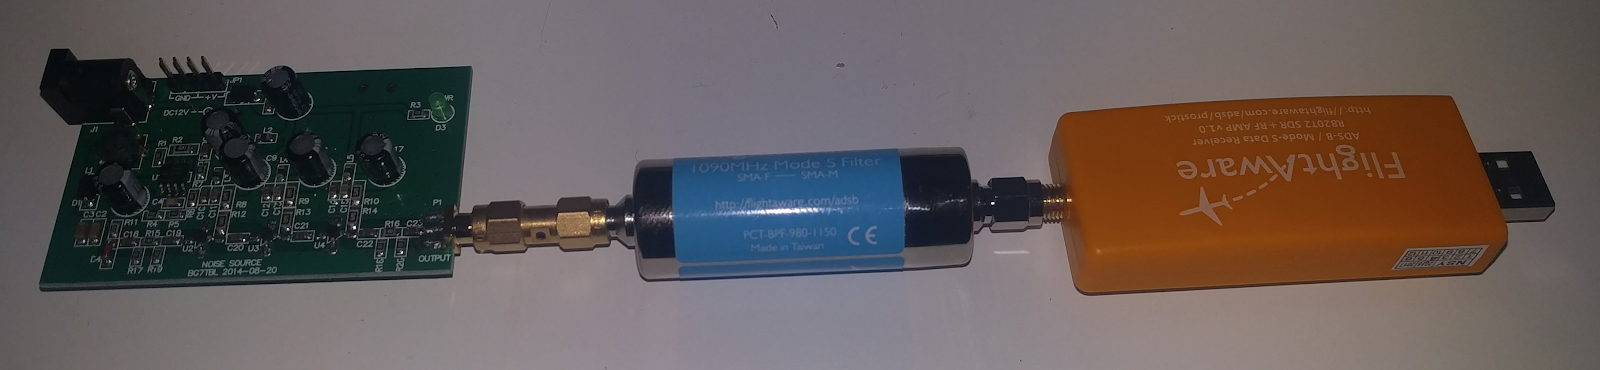
Performance of the $30 solution (left) vs a $550 solution (Mini-VNA, right):
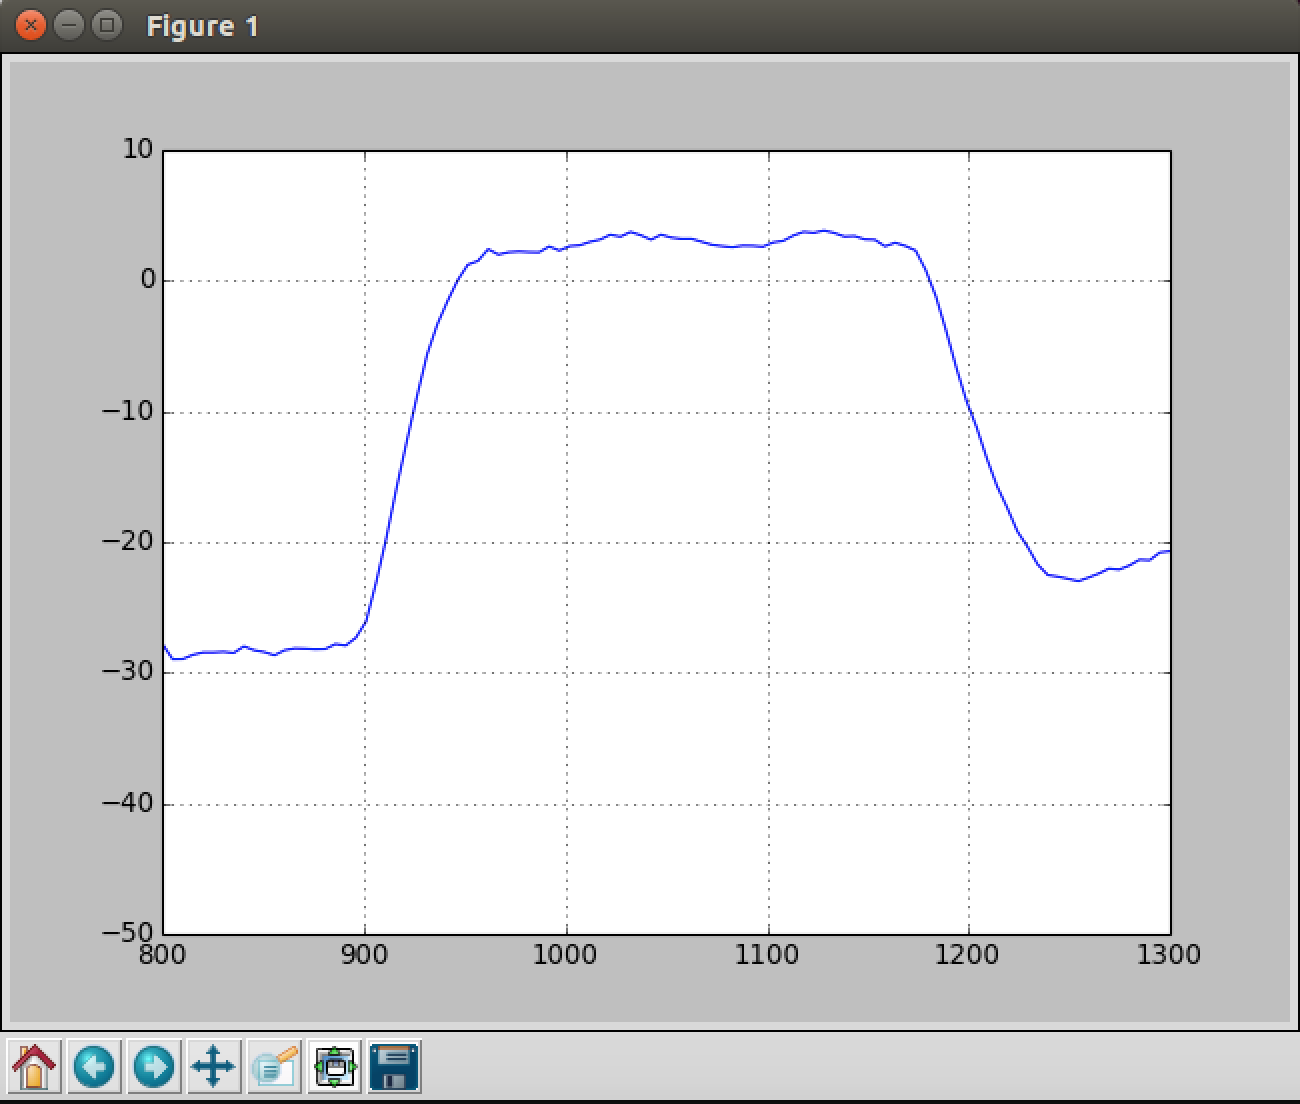

The dynamic range (difference between strongest and weakest signals, or how far down you can see) is not as good on the home-made solution, but it is only 5% of the price!
Want to check that the 2m tape-measure Yagi you built is cut to length? Add a directional coupler.
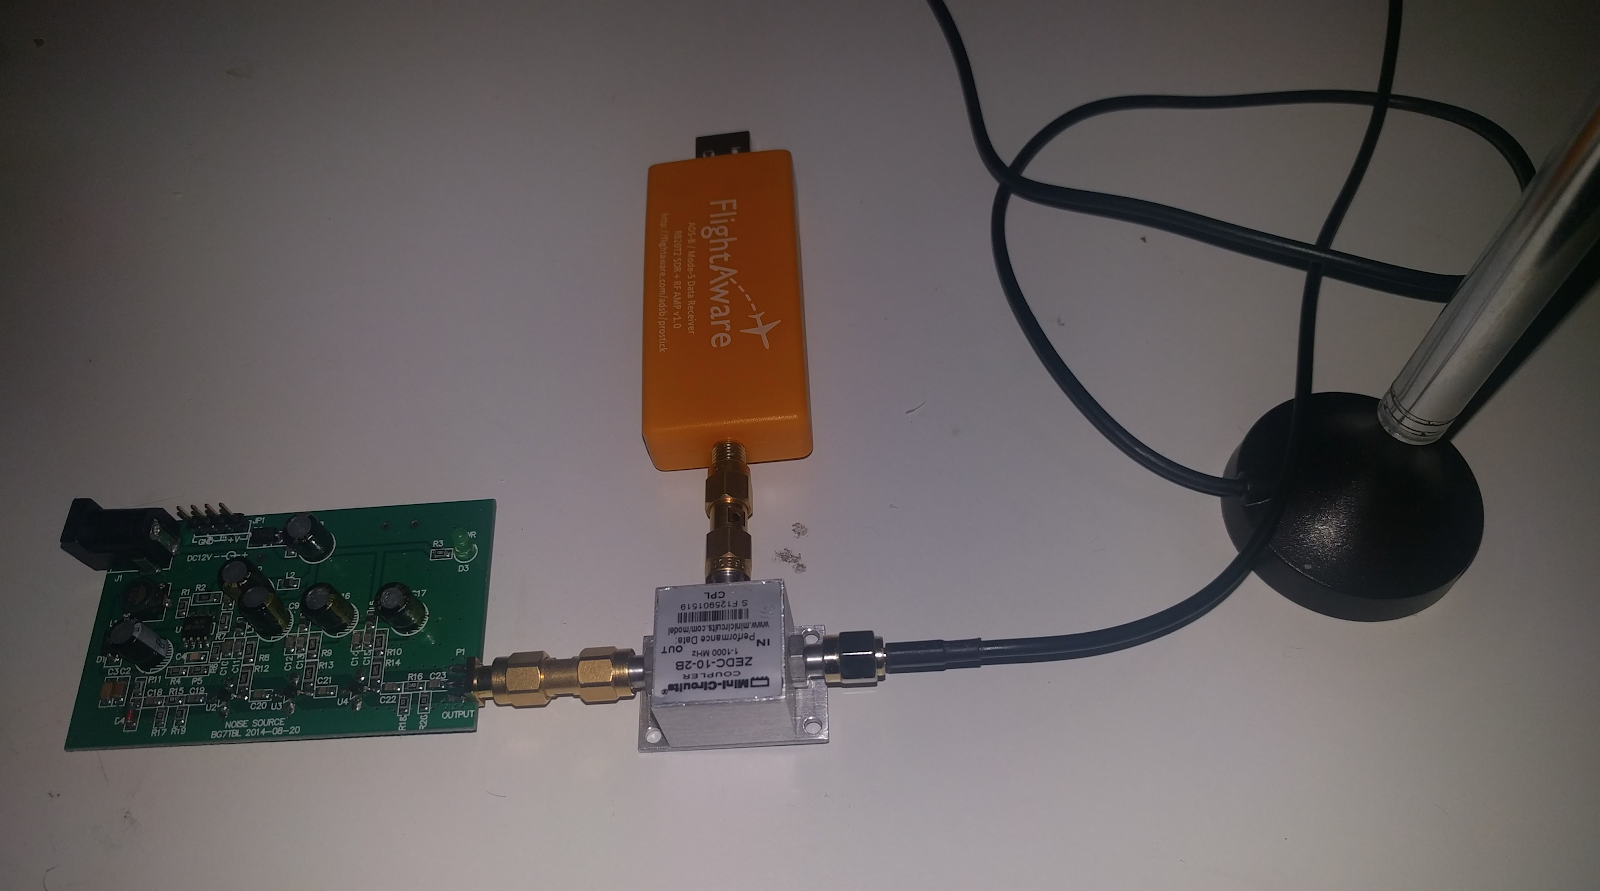
This time I compare the $50 solution (we added a directional coupler) with a piece of test equipment that cost $14000 (yes, that's fourteen thousand dollars!) - the Anritsu S412E :
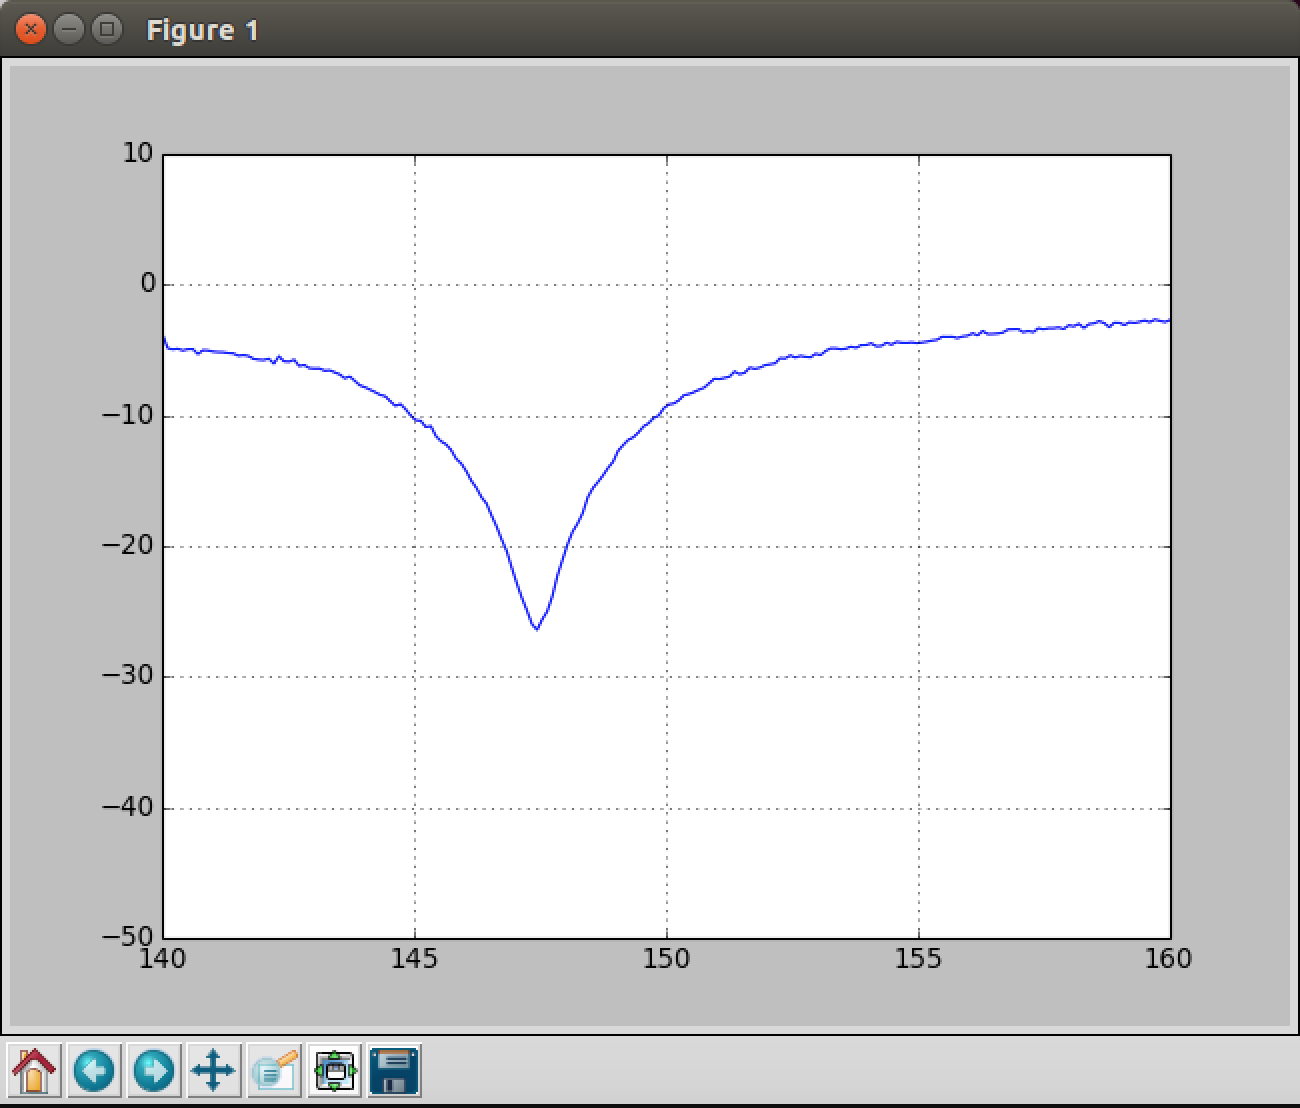
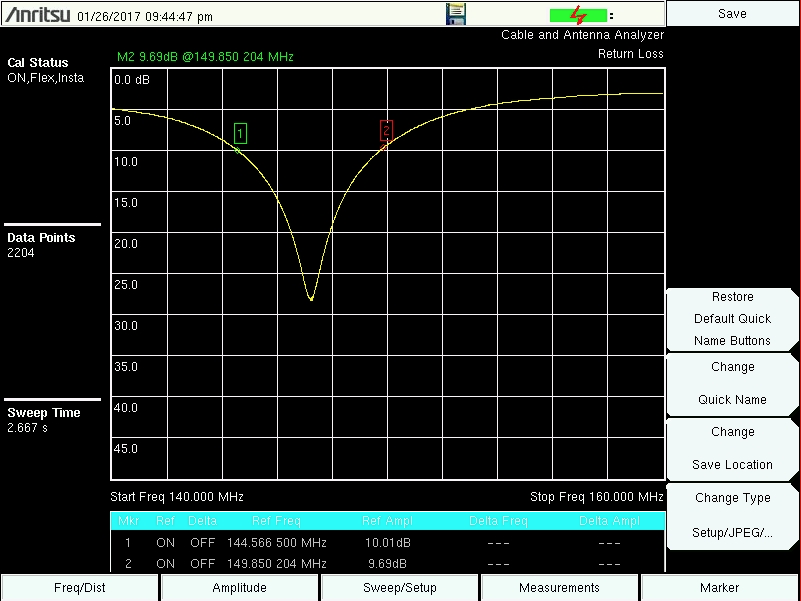
When it comes to measuring a 2m j-pole antenna, it is difficult to tell the difference here, and yes, the $14000 device can do much more, when it comes to trimming and antenna you can get great performance for very little out-lay.
The details of how to do this are outlined in the excellent site rtl-sdr.com (more specifically here), but I have gone one step further and scripted the calibration stage. This will be the subject of a future blog post.
No comments:
Post a Comment